NEW REGISTRATIONS CURRENTLY SUSPENDED

How to Register with this site:

  1. Click on the REGISTER button at the bottom of each page

  2. Another window will open with a Registration Form

  3. Fill in the boxes on the form as necessary

  4. Click on the SUBMIT button at the bottom

 How to Add a Message:

  1. Click on Post Bag in the menu

  2. Click on Create a New Message

  3. Complete ALL the boxes

  4. The date MUST be in DD/MM/YY format (i.e. 05/03/02) - if the date is not in this format your message will  be lost

  5. Click on SAVE MESSAGE

 How to Add a Memory:

  1. Click on Memories in the menu

  2. Click on Add a Memory

  3. Complete ALL the boxes

  4. Click on ADD MEMORY

 TIP FOR PC USERS ON HOW TO AVOID LOTS OF TYPING WHILST ON LINE 

You can do the first part of this while you are off-line.

  1. Open Notepad or a similar simple text editor

  2. Type your Personal Notes or Message or Memory

  3. Select all the text and go to EDIT and then COPY

  4. Go on-line, open the Torbitt website and navigate to the entry form you need

  5. Put the cursor in the blank Personal Notes or Message or Memory box (click inside the blank box)

  6. Hold down CONTROL+V

  7. The text you copied from Notepad should now appear in the box

  8. Don't forget to fill in the other fields!

  9. Click the SUBMIT, SAVE MESSAGE or ADD MEMORY button

 How to Search for Contacts:

  1. Click on Contact Page in the menu

  2. To search for a particular name enter EITHER all or part of first name ORsurname (not both!) and click the SEARCH button

  3. You can also see the latest additions or the full list by clicking on the appropriate links.

 Guidance Notes for Emailing Pictures:

  1. First check that a similar photo is not already on the site.
  2. Photos should be submitted in JPG format suitable for the PC
  3. Scan at 300 dots per inch if possible.
  4. If the photo is curled then weight the lid of the scanner with a heavy book!
  5. Scale to no larger than 800 pixels wide (no larger than 300k file size if possible)
  6. Email them as attachments - one at a time.
  7. The name of file should reflect the title of the picture!
    (eg "1965class3b.jpg" rather than "school.jpg").  
  8. Please supply year taken and name of class
  9. The photo can then be included in the website and you can use the form that is below it to enter the names in the correct positions.
  10. ....and note that we reserve the right to reject pictures - usually either because it is a subject already covered or due to quality

 Tip for seeing the latest version of the site:

If you think you may not be seeing the updates then it is probably because the site's pages are stored in your browser's memory (the cache).


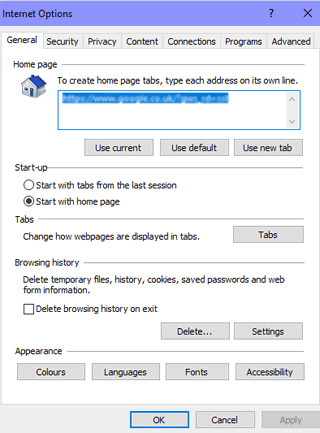
For Internet Explorer users:

  1. At the top of your browser window go to TOOLS (little cog symbol) and then INTERNET OPTIONS - you will see a window similar to the one shown below:


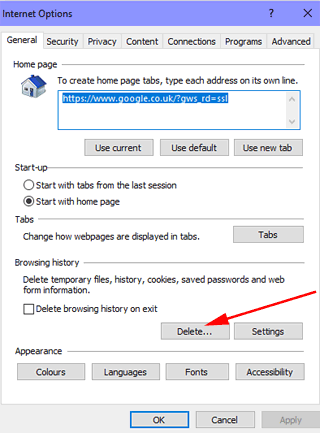
  2. Under Browsing History, click on DELETE

  3. This will clear the cache

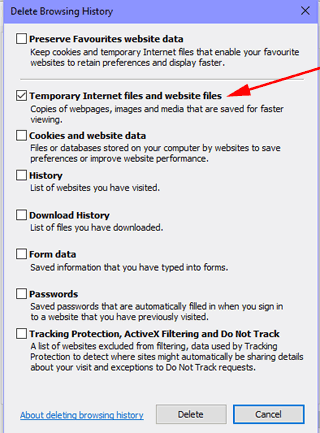
  4. You can also click on SETTINGS


  5. Tick the box for Temporary Internet files
    cache

  6. Click on the Delete button and wait until the deletion is complete

  7. Click on OK to close the windows
  8. At the top of your browser window click on REFRESH (little circular arrow to the right of the address bar)

For Chrome users:

  1. Click the Tools menu (three vertical dots in top RH corner)
  2. Go to MORE TOOLS > CLEAR BROWSING DATA.
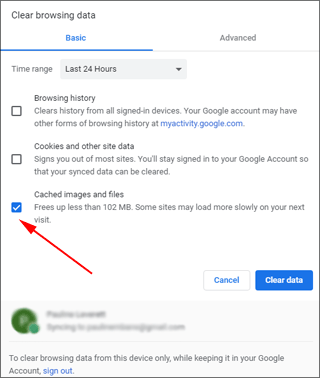
  3. Select a time period from the drop-down at the top
  4. You only need to have CACHED IMAGES AND FILES selected
  5. Click Clear data.